A well-formed THT solder joint ensures reliable electrical connections, preventing failures and malfunctions. Here is a step-by-step guide on how to hand solder a THT component to secure good electrical conductivity.
01 – Always use the lowest possible temperature according to the mass around your component. (see note #1)
02 – Ensure your tip is properly tinned and clean of oxide.
03 – Touch the pin with solder and add more solder wire between the tip and the components so that the solder melts.
04 – Withdraw the solder wire while keeping the tip in the same position for a few seconds, allowing the molten solder to be uniformly distributed on the component and the pad. (see note #2)
05 – After a few moments, lift the soldering tip and allow the solder to air-cool.
06 – Check that the menisci have formed properly between the component and the pad.
Note #1: More mass will implied more temperature
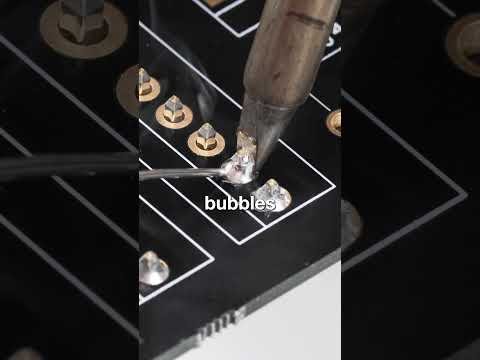
Note #2: The presence of bubbles is a good sign; this means that the solder is flowing down the through-hole joint.
🔎 INTERESTING PRODUCTS:
CDB Soldering Station
https://www.jbctools.com/cdb-soldering-station-product-1605.html
C245 Cartridge Range (used in video C245785):
https://www.jbctools.com/c245-cartridges-for-t245-handpiece-product-19.html
Stay tuned to our channel for more! @JBCSolderingTools
#circuitboard #electronicsdesign #electronics #engineering #handsoldering #howto #howtoJBC #JBCtools #rework #THT #resistors #capacitors #diodes #transistors, #integratedcircuits #ICs